

Step 1: The hardware
To get started, this project requires a few components…
- Raspberry Pi 3
- SD card of at least 2GB size (you might as well get a 16GB … price is more or less the same)
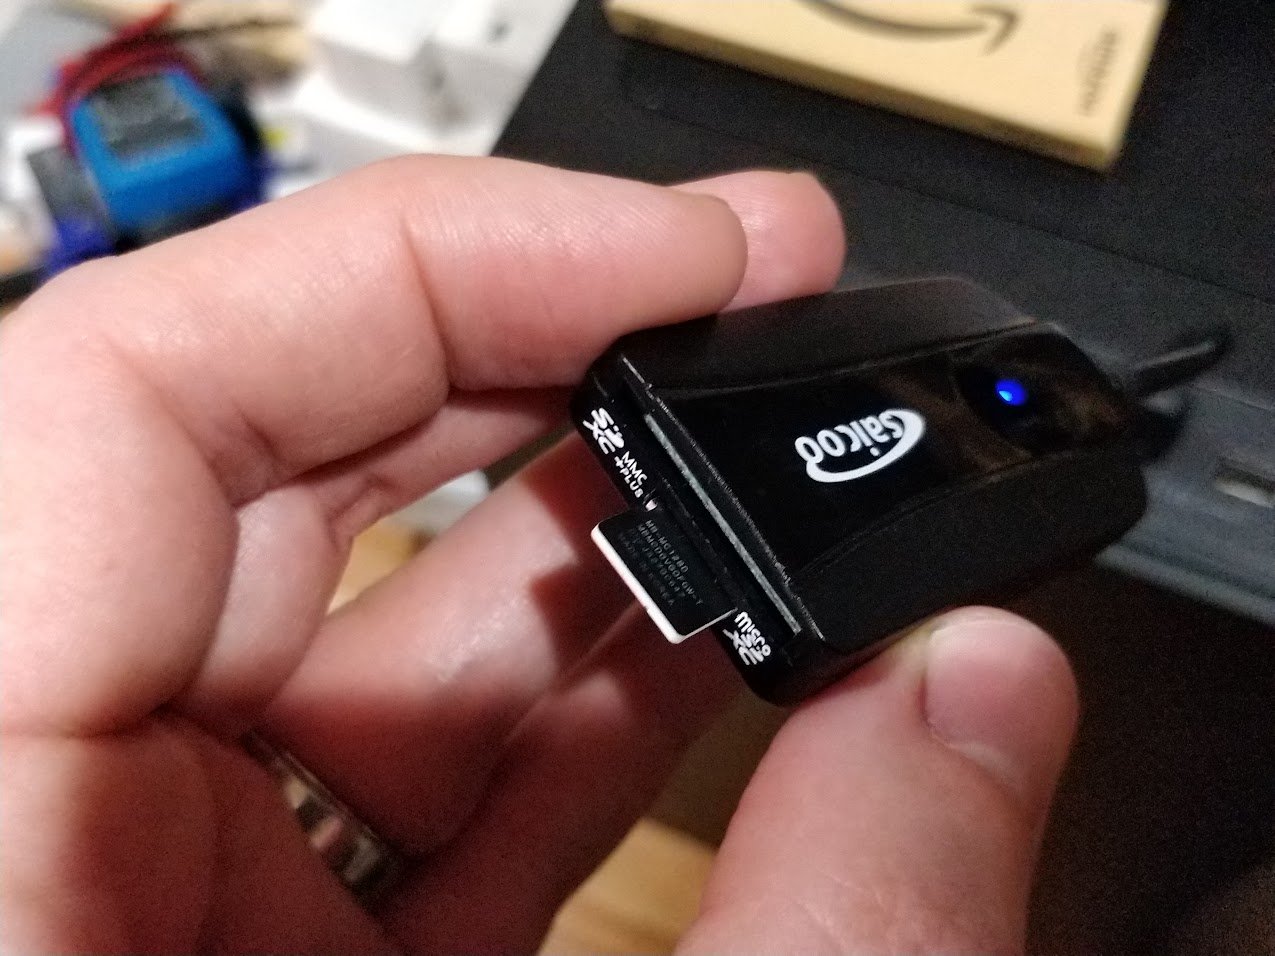
- SD card reader
- Decent monitor with HDMI or DVI input and…
All in all you should be able to get away with around $160 + tax for the components, this even if you have to buy all the parts new from Amazon.
Oh, and it might be good to have WiFi in your house, since this guide will assume you do.
Step 2: Getting the software
The software can either be installed manually by following the instructions on the github page, or (preferably) you simply download the Raspbian image found on the release section. This guide assumes you do the latter.
Once you’ve downloaded the image file, you need to flash it onto your SD card. The easiest method is to download and install etcher, which has versions for Windows, OSX and Linux.
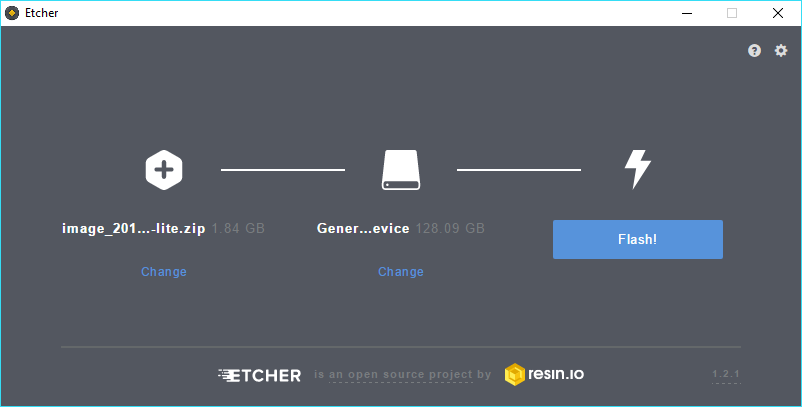
Once you’ve installed etcher, simply insert the SD card in your reader and start etcher.
From here, you select the zip file you downloaded, and if not already selected, you pick the drive with the SD card and then you hit flash.
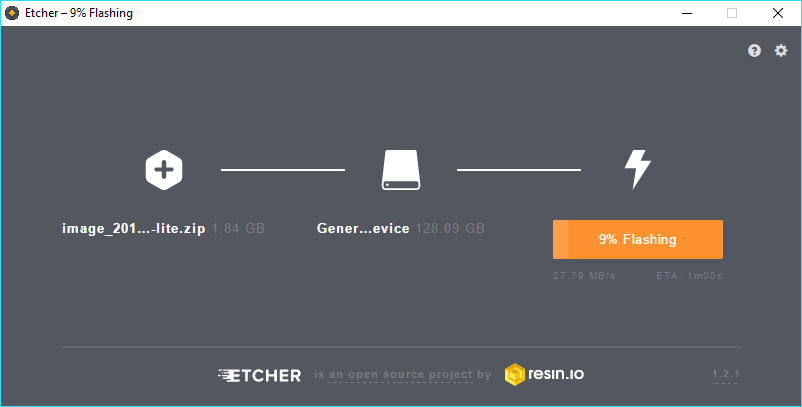
Depending on your SD card, you may grab a beverage of your choosing while you wait.
Once this has completed, and etcher has validated that what it wrote was indeed what was saved, please remove the SD card from your reader and close etcher.
Step 3: Configuring the network
To keep things easy, we need to pre-configure the WiFi that photoframe will use.
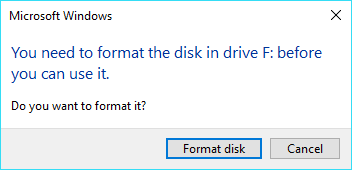
Insert the SD card into your reader again, depending on your operating system you may get a couple warnings that you have to format the drive. Do not do this, just press cancel as needed.
In the end, you should have a new removable drive called boot. If you open this one, you find a bunch of files, but among these, there’s one called wifi-config.txt.
Open this with your text editor (I do not recommend using notepad on Windows since it doesn’t understand the line endings used, instead use wordpad or your favorite text editor).
You’ll see something like this:
# Please do not change anything but the contents within
# quotes for wpa-ssid and wpa-psk
#
# wpa-ssid = Name of your wifi
# wpa-psk  = Password for your wifi
#
# For example:
#   wpa-ssid "my little wifi"
#   wpa-psk "super secret password"
#
# NOTE! The spacing in-front of these keywords is crucial,
#       do not remove
#
iface wlan0 inet dhcp
  wpa-ssid ""
  wpa-psk ""
And as you can see, it’s indicating that you should change the two last lines, specifically the wpa-ssid and wpa-psk lines.
Simply replace the text inside the quotes for the wpa-ssid with the name of your wifi and replace the text inside the quotes for wpa-psk with the password needed to access your wifi. So if we assume your wifi is called internetz and the password is hacktheplanet, the file should look like this
# Please do not change anything but the contents within
# quotes for wpa-ssid and wpa-psk
#
# wpa-ssid = Name of your wifi
# wpa-psk  = Password for your wifi
#
# For example:
#   wpa-ssid "my little wifi"
#   wpa-psk "super secret password"
#
# NOTE! The spacing in-front of these keywords is crucial,
#       do not remove
#
iface wlan0 inet dhcp
  wpa-ssid "internetz"
  wpa-psk "hacktheplanet"
Save the file and close the editor.
There’s also an optional setting which you can change, and that’s the username and password used to access the configuration page for the photoframe.
By default the username is photoframe and the password is password, but this can be changed by opening the file named http-auth.json and changing it. So if you want to use hacker and username and photos as password, it would change from
{"user":"photoframe","password":"password"}
to
{"user":"hacker","password":"photos"}
If you would rather not have any username and password at all, you can simply delete this file to turn it off.
Once you’re done, please unmount/eject the SD card (so we don’t mess up the changes we just did).
Step 4: First boot
Make sure you connect the monitor to the Raspberry Pi 3 (RPi3) and insert the prepared SD card before you connect the RPi3 to power. Because they will immediately turn on once you do.
On the first boot, you’ll not see much at all and it will also take a bit longer because the RPi3 will adjust the flashed image to take full advantage of all the available space. So if you flashed a 128GB memory card with the image, it will expand to use the entire 128GB space. This is by design, which is why you shouldn’t worry if it takes a few minutes.
It will also reboot once it’s done.
Again, during this process, very little will be shown on the screen. This is on purpose, because we don’t want to to show any linux like behavior.
Step 5: Setting up Google Photos
Once the first boot has been done, it will very quickly boot up and connect to WiFi. If for some reason it’s unable to connect, it may take up to two minutes before you see anything on the screen. At which point you’ll get a message saying “No internet”.
If this happens, just turn off the RPi3 (disconnect power) and recheck the wifi settings (see step 3).
More likely is that it will boot up successfully and prompt you to use a web browser to finish the setup which I strongly suggest you do.
The following steps are out of date as of v2.0 of photoframe. Please follow instructions in webbrowser instead. A new post will be made with accurate steps after the holidays
Original steps retained for historical purposes :-)

Once loaded up, it will prompt you for something called OAuth2.0
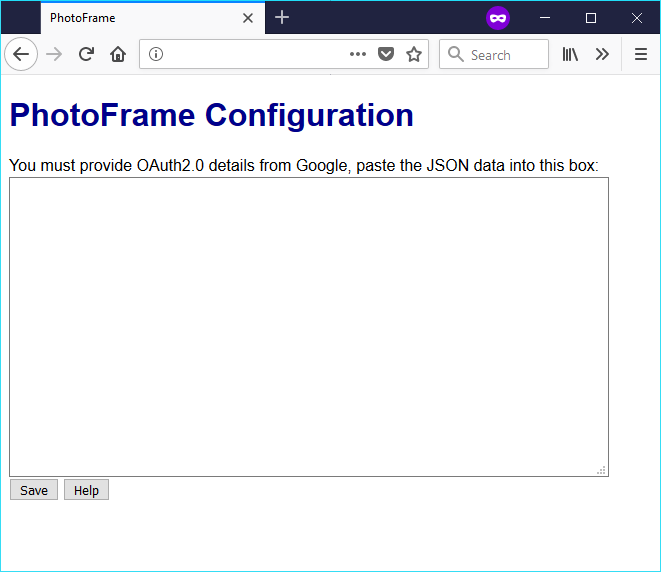
If you click the help button, it will take you through the steps, but here’s a more visual guide for your convenience.
First, you’re going to go the Google API dashboard to create the credentials.
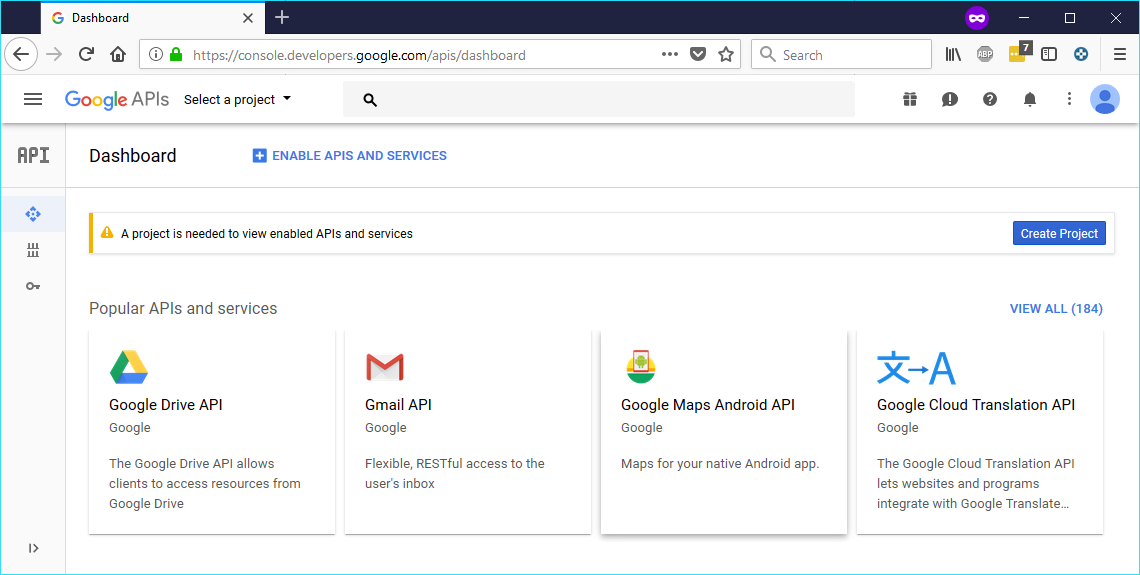
Click on the Create Project button
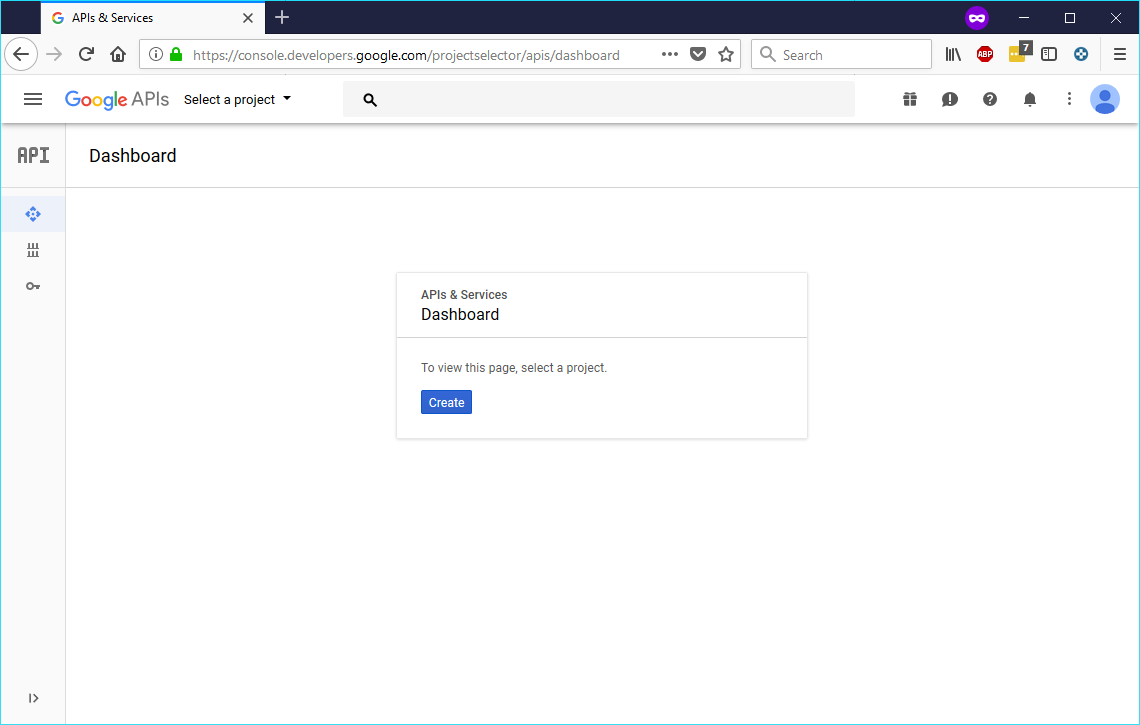
This presents a new screen, press the Create button to create the first project
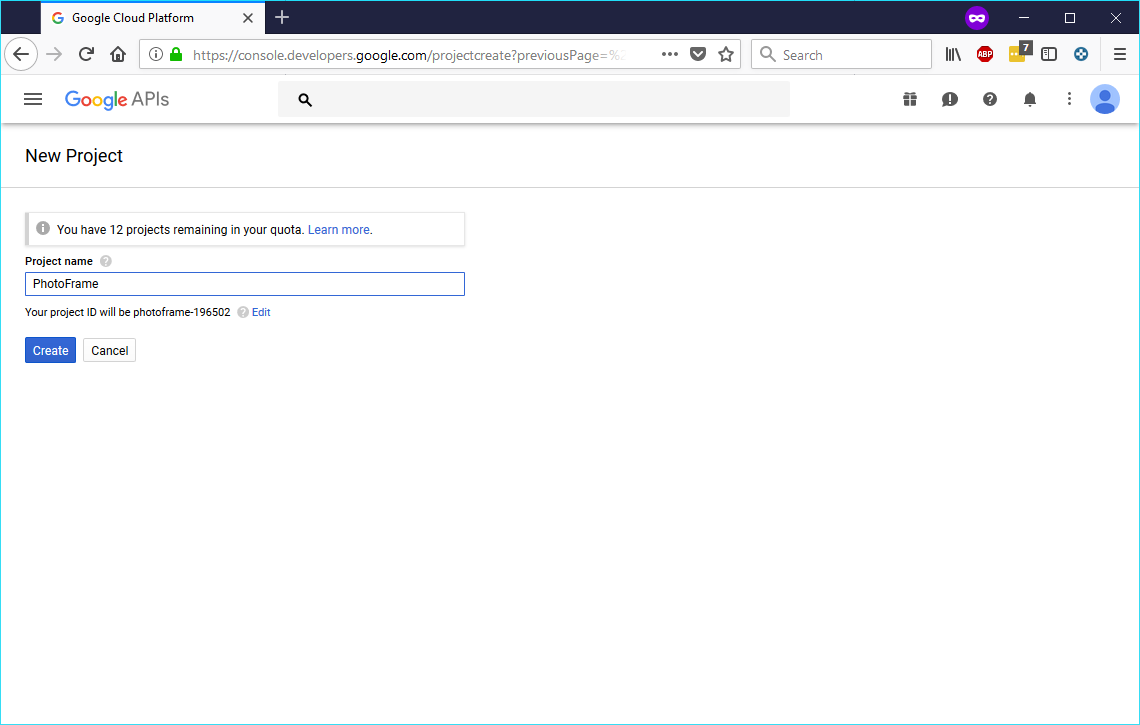
We’re going to name this project PhotoFrame and press Create to continue
After a few moments, you end up here, on your very own dashboard, with the PhotoFrame project selected (in the top/left corner).

From the menu on the left you now click on Credentials
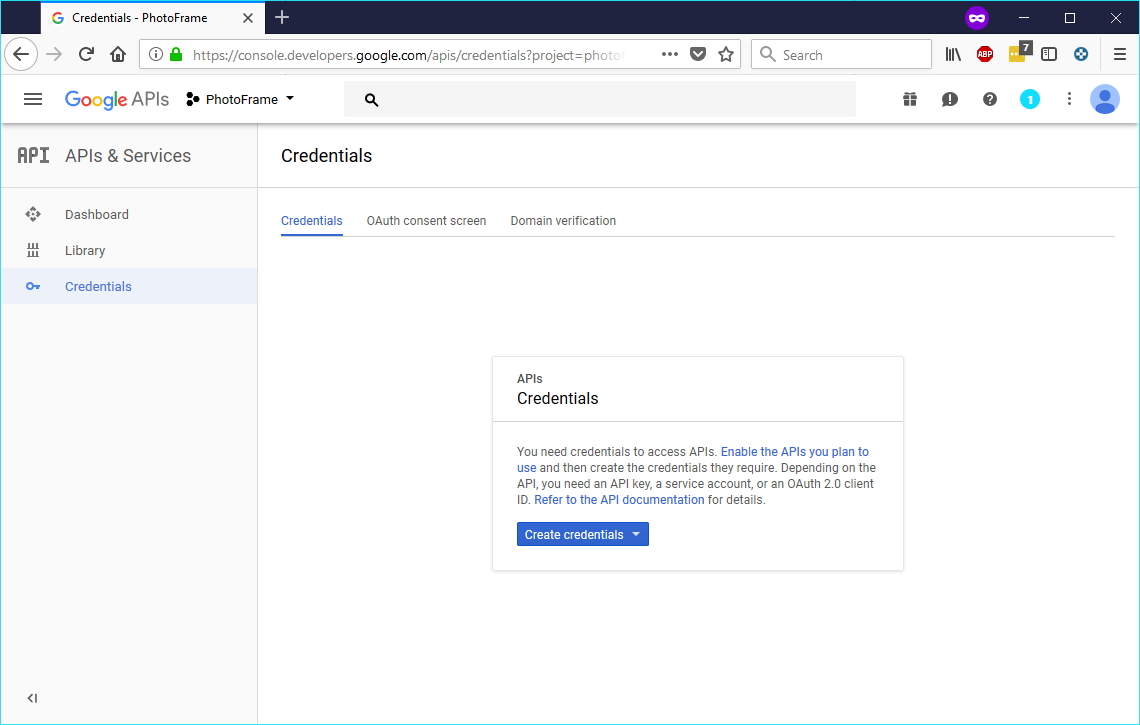
Time to Create credentials, so press that button
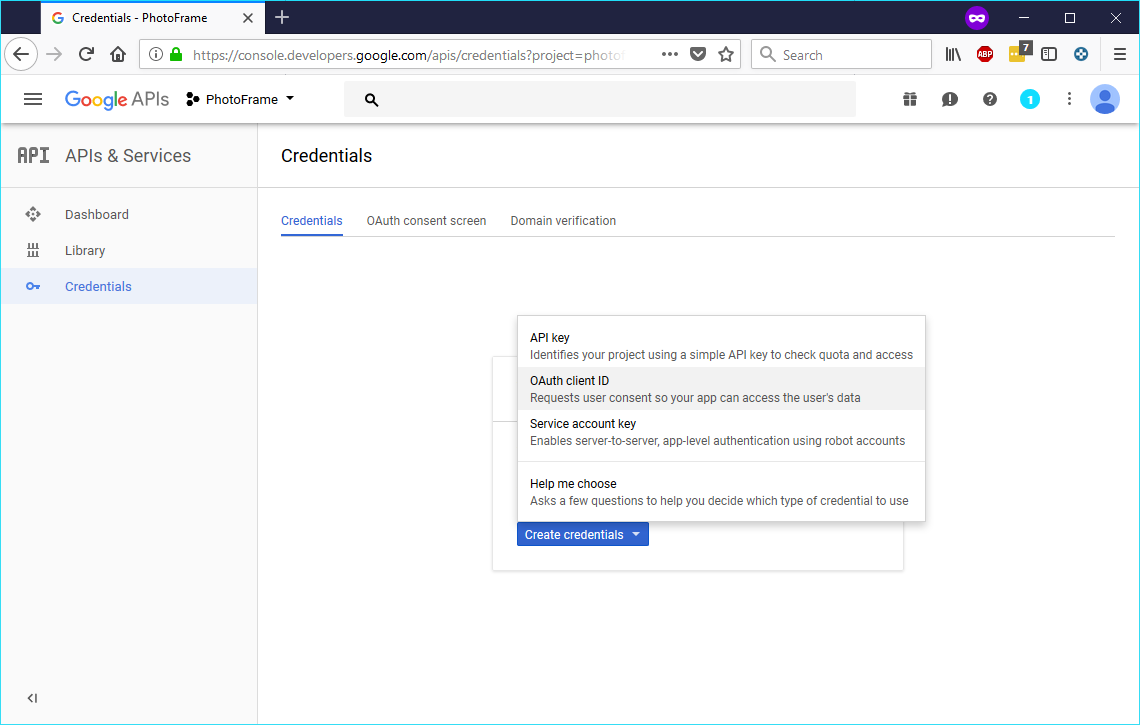
On the menu that pops up, choose OAuth client ID

Next, it will ask you to Configure consent screen to continue, so lets do that
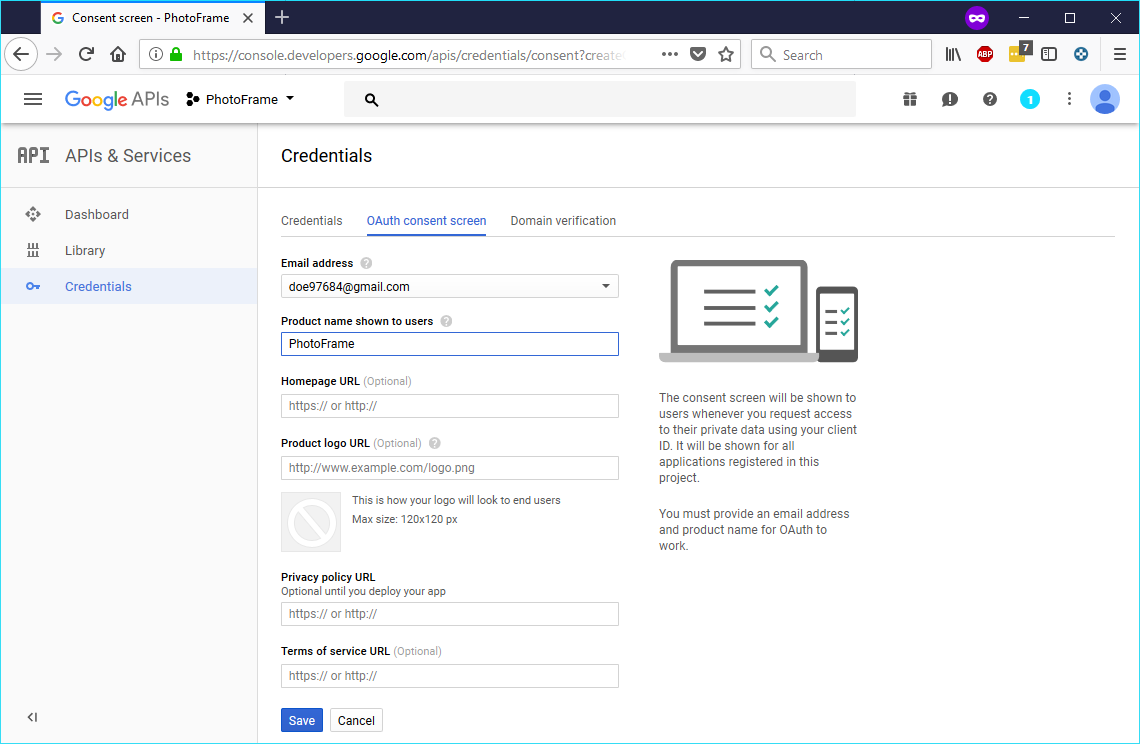
Google will now require you to fill out a bunch of items, but in reality, since this is for your use only, we’re just going to provide a product name. In this example, we choose PhotoFrame. Click Save once done.
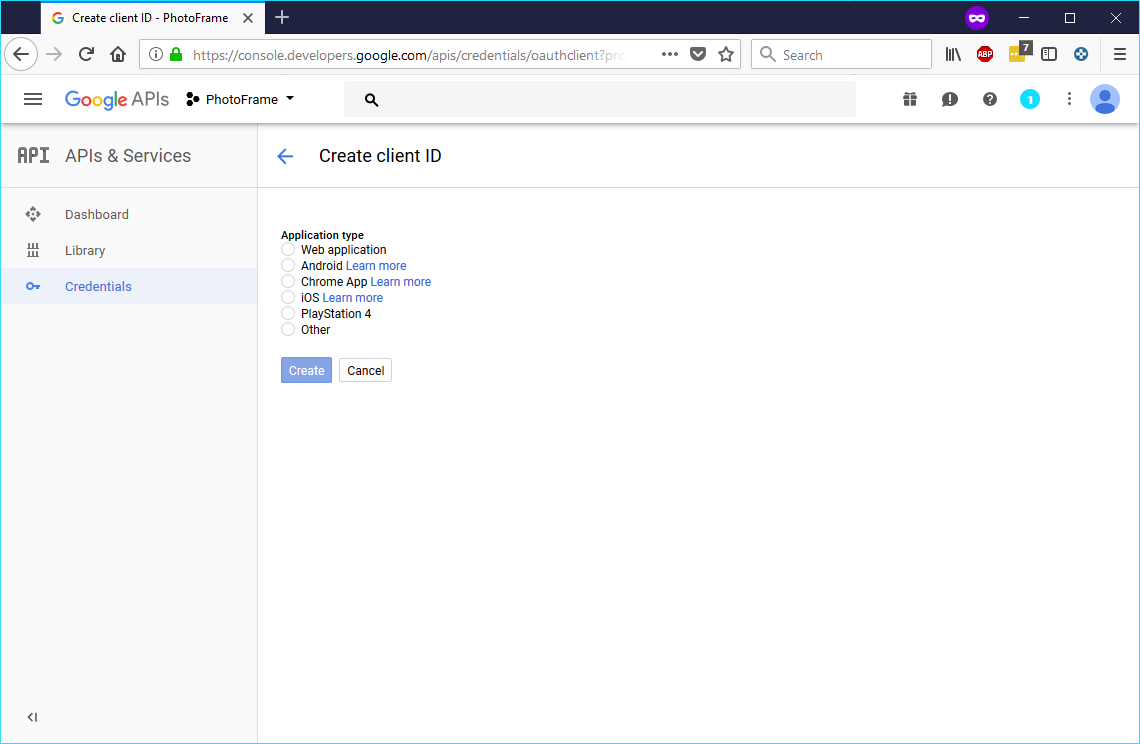
Now we can choose an Application type. For our purposes, select Web application.
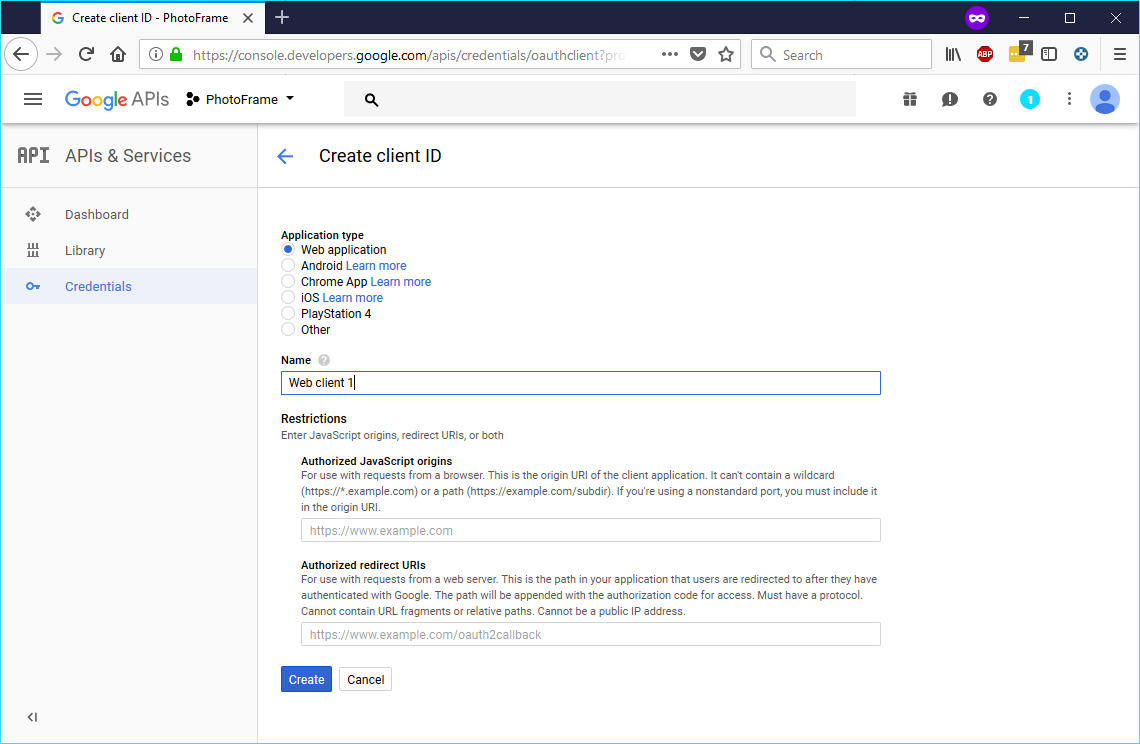
This will open up some more options. Again we need to name it and also provide what’s called Authorized redirect URIs.
For the first part (the name) we’re going to use PhotoFrame and for the second part, you must enter https://photoframe.sensenet.nu or you’ll not be able finish the Google Photos setup later in this process. For more details on why, see this part of the README.md.
Once you’ve entered all the details, it should look like this
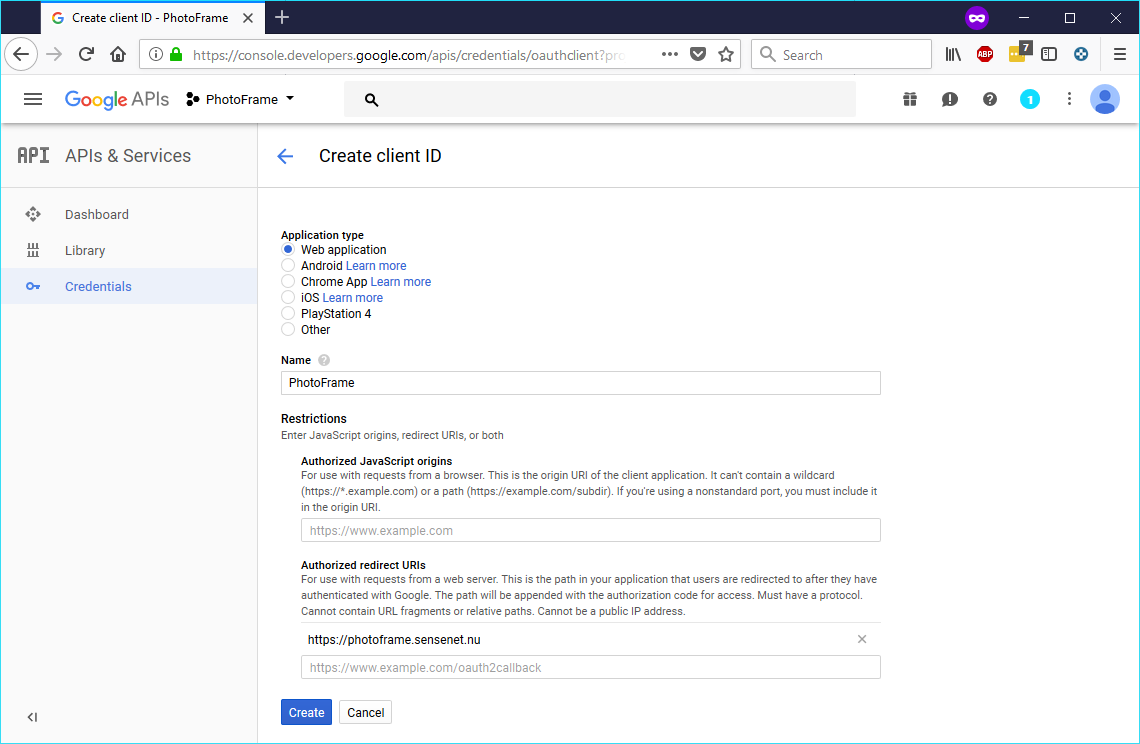
and now you can press Create. This will create the credentials and also pop open a small window with client ID and secret.
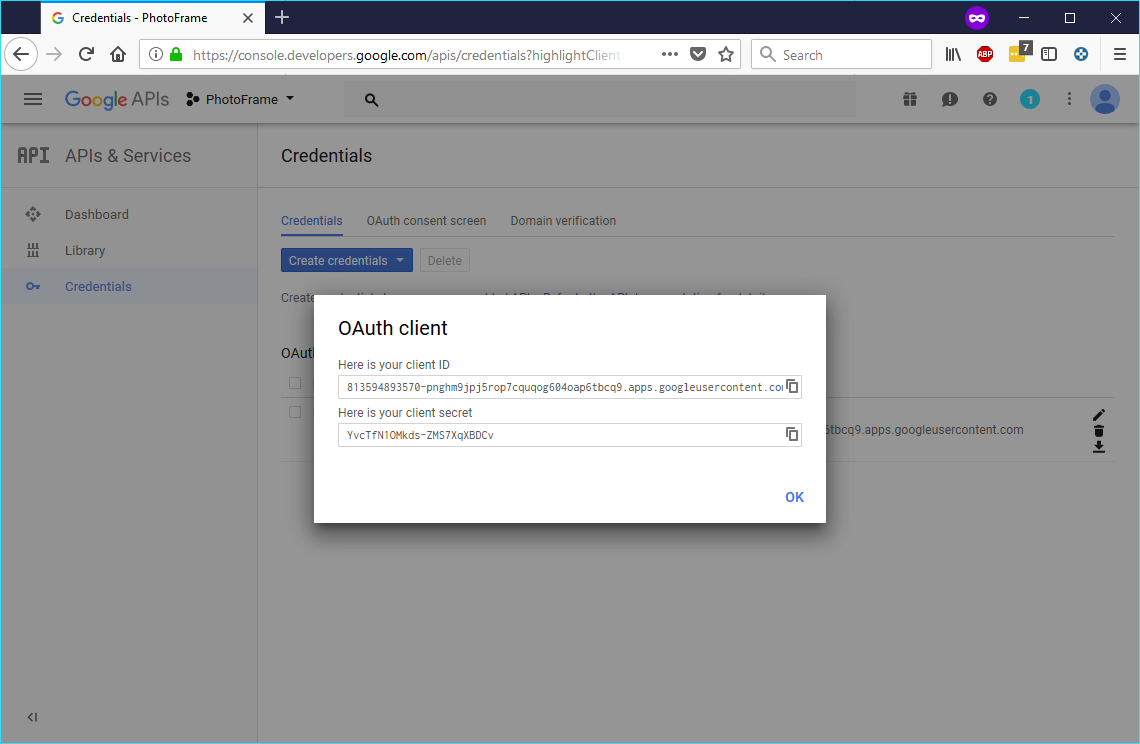
You can just press OK to dismiss this.
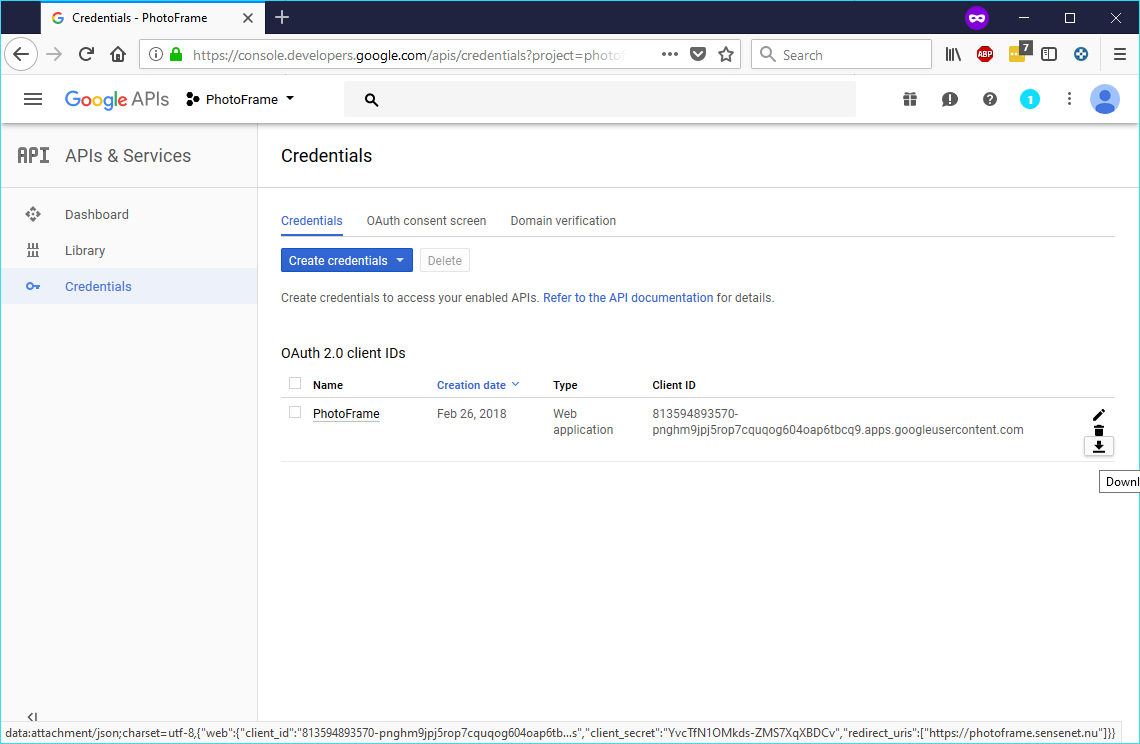
On this new screen, on the right-most area, you’ll find a button/link which will allow you to download the credentials instead. Click that link and save the resulting file
Next, you’re going to open this with your favorite text editor
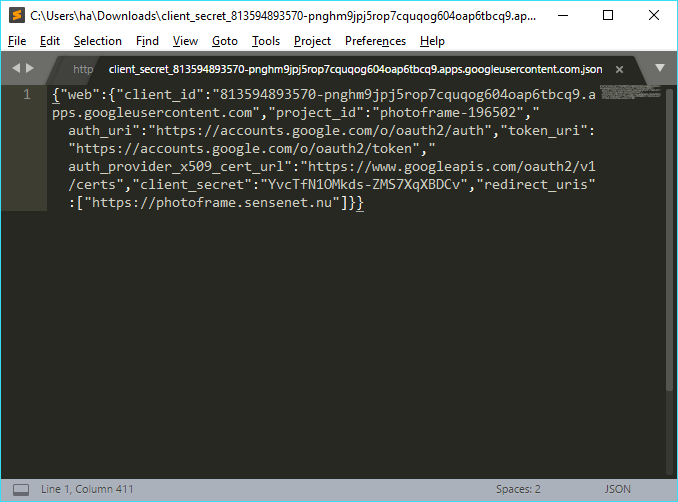
Highlight all the text (CTRL-A or Command-A) and copy the contents. Next, switch to the web browser and paste it into the text box.
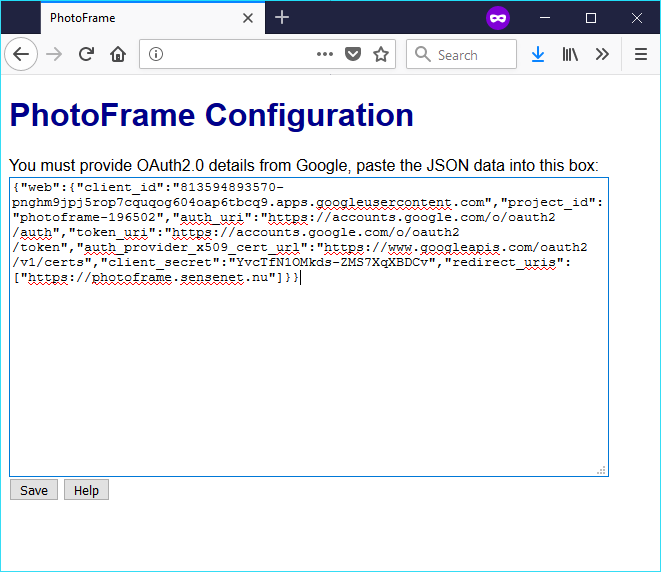
Time to click Save
Once saved, you’ll get a new screen to link with Google Photos
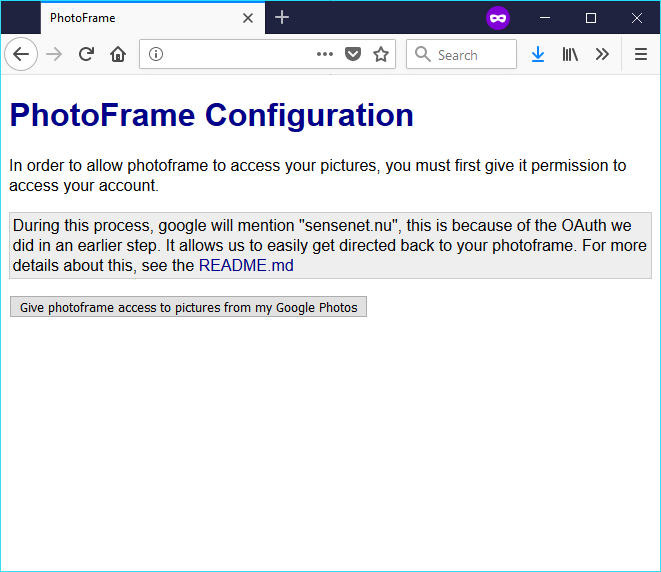
Continue by clicking Give photoframe access to pictures from my Google Photos button (yes, no kidding ;-)).
This takes you to a Google page where you choose your account
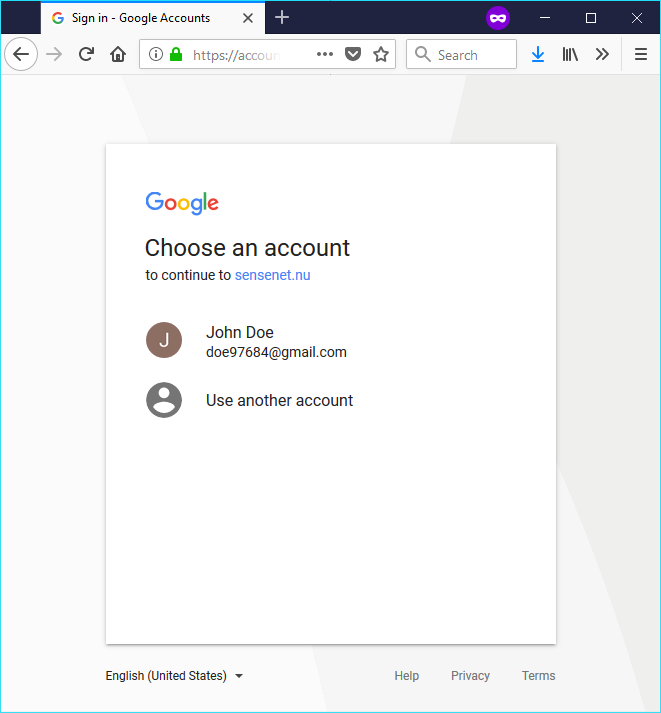
Pick your account (if you aren’t already logged in, you may get prompted to do so first).
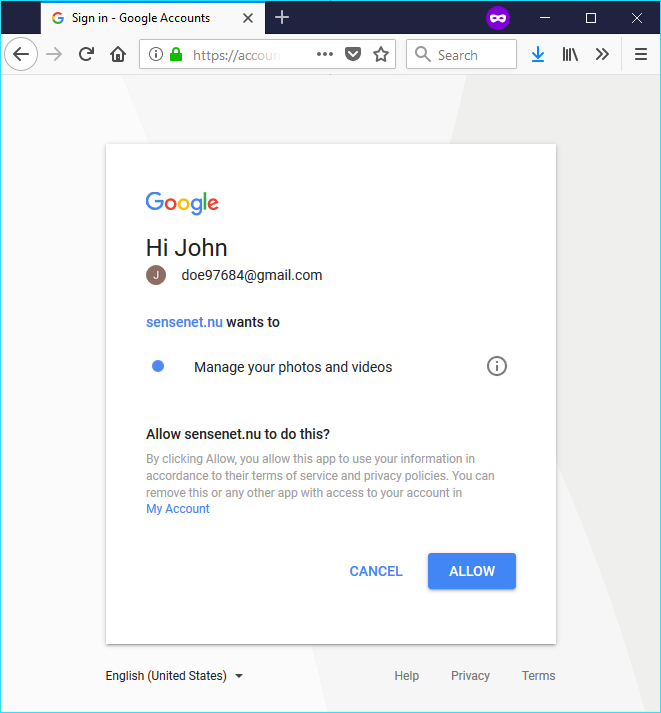
Once selected, you have to consent to giving access to you photos to sensenet.nu. The reason you get sensenet.nu is because of the redirect URI we entered before. Do not be alarmed, this is simply to make OAuth2.0 work with your dynamic IP address.
You can read more about this here.
Press Allow to continue.
After you allowed access, you’ll be taken back to the main configuration screen for the photoframe software
You’re done! You’ve successfully linked your Google Photos to the photoframe.
Note!
Do not go back and delete the credentials we setup since it will invalidate the access.
Step 6: Configuring photoframe basic settings
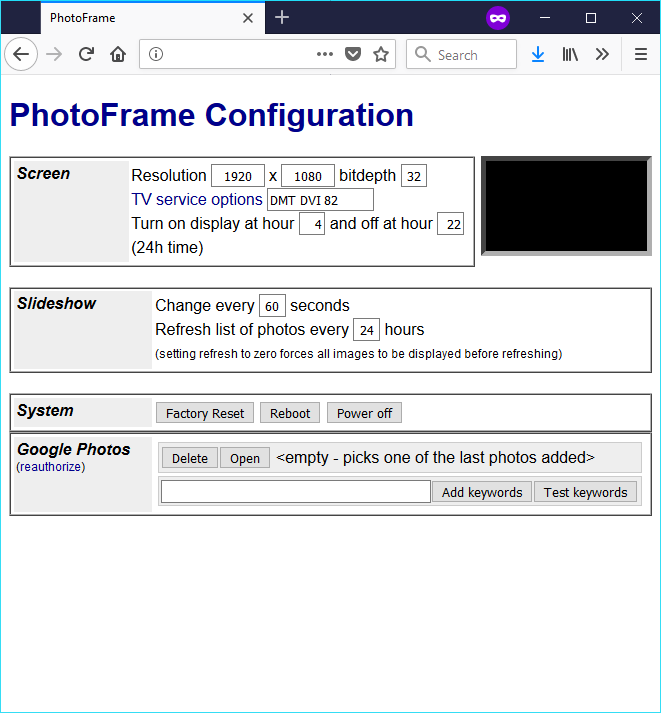
From the web interface you’re now able to tweak all the settings for photoframe.
All settings are saved the moment you deselect the box and if necessary, the change triggers a display change.
The first option of interest may be the monitor settings (it should have detected a preferred default mode). If it’s incorrect, you can change it by editing the “TV service options”. It’s unfortunately not the most user-friendly setting, but it’s a start :-) By clicking the link, it will query and show you which settings that are supported by your display.
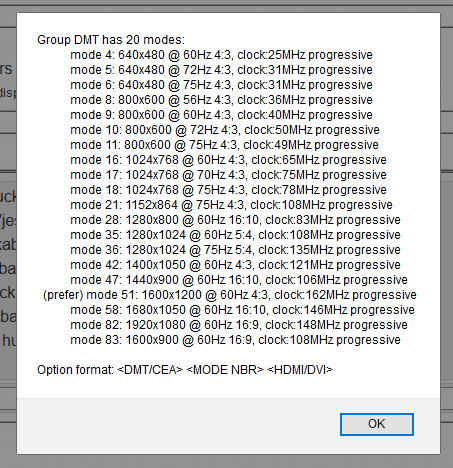
From this list you can compose your desired setting using the format
The first option is either DMT or CEA depending under which grouping the mode belongs. Next you write the number of the mode and finally you tell it how the display is connected (via HDMI-2-DVI or HDMI-2-HDMI cable) by stating either DVI or HDMI.
Please note that if you change resolution (say, from 1280x720) you also need to update the width/height settings. Usually the bitdepth of 32 can be left-as-is.
You can also decide which hours the display should be in standby mode by entering the hour of day to turn off and what hour of day to turn on again. This is entered in 24h format, so 2pm is 14, 8pm is 20, etc.
Photoframe accomplishes power off using regular standby functionality of most displays. Please note that some displays (Viewsonic for example) will turn off completely if left in standby for too long. This can sometimes be controlled from the on-screen menu of the display.
By default, the photoframe will cycle images every 60 seconds, but this can be altered. Likewise, you can force photoframe to refresh the list of photos every X hours. By default this is set to 24, but by setting it to zero, it will cycle through ALL images it has been told to show before refreshing
Step 7: Getting some quality photos
By default, if you don’t do anything, it will ask Google Photos for the latest photos. This however has a couple caveats…
- Might pop up photos you don’t want (expense report receipts anyone?)
- A bit too personal photos
- Unreliable (I only get 5 photos with this option, go figure)
But, there is a solution. By adding keywords, you can control where photoframe culls the photos from. The cool thing with this is that Google Photos does a lot of image classification, allowing you to write things like sweden, thanksgiving, John Doe, etc.
Essentially anything which you can search on photos.google.com you can add as keywords, so if you want photos of you and your wife, you enter

and click Add keywords … Clicking Test keywords simply opens photos and shows you what that would show.
Even cooler, if you want pictures of you and your wife but not your dog, you do

Pretty neat huh?
Via the Google Photos API photoframe is able to get at most 1000 pictures per search (odd but true limitation) so be sure to add a lot of searches.
And that’s it :-)
Overtime
Some interesting facts…
- Image is based on Raspbian and therefore use the same login and methods for enabling SSH
- To build your own image from scratch, check out https://github.com/mrworf/pi-gen
- Photoframe auto-updates on a regular basis using git as its mechanism, meaning that you’ll automatically get newer versions as they are developed.
- Photos with none-matching aspect ratios are shown in their entirety but has a zoomed up version of itself in the background (but blured and darkend)
- Color temperature is matched at the time of loading, meaning you will not see realtime changes if you change the light
- Use of IPS screen is preferred since it has a much wider viewing angle and better color reproduction